Phew, order has been restored to the kitchen. All the tiny glass bowls are in the dishwasher and the icing nozzles cleaned out. All the left over RI (not red, green or white) has been combined and made a milk chocolate brown. I’m following SweetSugarBelle’s suggestion of adding all left overs together to give a black RI a bit of a head start. All the RI is now in Glad zip lock bags, inside a larger one tucked in the freezer.
I’m not sure when I’ll be decorating cookies again. I don’t have any immediate plans, but nice to know I’ve got some colours all good to go when the time comes.
 I finished the Snow Globes this morning. I had piped the white over the first one and dipped it into the nonpareils and moved onto the second when I looked back and saw to my dismay, the weight of the nonpareils and the consistency of the RI was now slipping right off the sides of the cookie. Boo. Well that was quite a mess. I did what you’re discouraged from doing. I added more icing sugar to the white RI to thicken it up and then got to work with the last two. And I can tell you, peeling RI decorations off waxed paper isn’t as easy as Amber from SweetAmbs demonstrated. I bet the waxed paper in America is different from ours. I’m coming back with a suitcase full of Press ‘n Seal when we’re in the States in July.
I also had to thicken up the red a bit too. I had no problem piping the base of the Snow Globe, and thankfully I had plenty more cookies to decorate that I wasn’t hovering around waiting impatiently for the icing to dry enough before I added the next section of icing.
I had so many gingerbread cookies. I’ve got a whole other Tupperware Sweet Keeper chocka full of cookies that haven’t seen any RI.
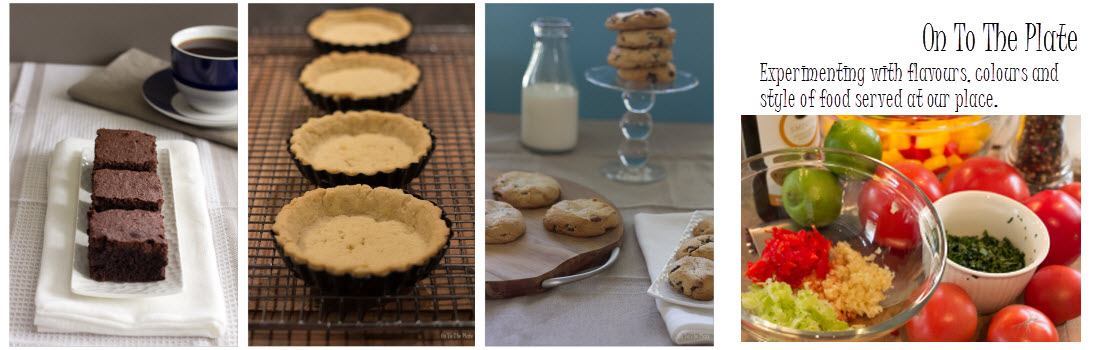
Here’s the other cookies that I pottered around “decorating” to keep me occupied this morning. 


Yesterday I made LMF, that stands for Liz Marek Fondant, Liz is the lady whose recipe I followed, though the recipe had been shared on another blog in metric, so I went with that. Today I decided to add some Americolor Sky Blue to it. I’m just tinkering. It’s good to know how easily fondant will take colour, and I’ve got to say it was really easy. The fondant is still sticky and I had to continue to use my bench scraper to assist me in kneading, only to save my hand from a build up of fondant (this is only necessary when the fondant has warmed up through kneading). I wanted to know if it would roll as nicely as the recipe I used from Jessicakes Craftsy class. Here’s the YouTube for Jessica’s recipe, and the one for Liz’s. Actually there’s not a huge difference to the core ingredients. Jessica’s recipe has some corn syrup where Liz’s recipe has some commercial (Wilton) fondant added.
The fondant does roll nicely, and I am still in awe how smooth it polishes up. I used and impression mate and rolled the fondant over it. I couldn’t get the fondant off in one piece. I tried a light dusting of potato starch and still had difficulties. I tried rolling the impression mat over the fondant. This was much better. You can see how I used the fondant as a different type of decoration on the gingerbread cookies.
And to round out the day, I used Little & Friday’s recipe for Sweet Shortcrust Pastry. I had browsed through the cook book on Show Weekend and snapped a few photos because I was too lazy and didn’t have time to write out the recipe.
This recipe requires 2 hours of refrigeration before use. And again the dough softens quite a lot by the time you’ve finished rolling it out. Thank goodness I have a tart press, or whatever it’s called. I opted for mini Christmas Mince Pies. Given how many cookies Mr Fussy is going to consume over the week, I think a smaller version of a Christmas Mince Pie will be just fine.
 I chilled the dough again in the tin before filling and then baking. I also used Vanilla Bean paste, you can see all those flecks of vanilla beans.
The first tray I baked for 11 minutes, the second tray probably closer to 13 minutes. The first tray has a nice crunch to the pastry, but the second has a nicer crunch, but they browned a little more. Not that I think they’ve coloured too much, and let’s face it, if you dust with icing sugar, it wont even be noticeable. I think I’ll split the difference and go 12 minutes next time.
 I’ve converted the dry ingredients into weight (I prefer weight, that wont ever change, but a cup of flour is not often the same measure a second time, depending on how you fill, whether you tap it, and if you level it) measures. I also tweaked the method a bit and have given all details.
Sweet Shortcrust Pastry by Little & Friday
Makes 48 mini Christmas Mince Tarts
Ingredients
- 360gm or 2 3/4 cups Flour
- 150gm or 1 cups Icing Sugar
- Pinch of salt
- 250g unsalted butter, well chilled and roughly chopped
- 1 egg lightly beaten
- 1 tsp lemon juice
- 1/2 tsp lemon zest
- Vanilla extract or vanilla beans to taste (I used ½ teaspoon of vanilla bean paste)
Instructions
- Place the flour, icing sugar and salt into a food processor and pulse a few times to get air into the ingredients and to combine them.
- Add all the chopped butter and pulse until the ingredients resemble breadcrumbs.
- Tip in the lightly beaten egg, lemon zest and juice and whatever type of vanilla you’ve chosen.
- Pulse 10 times, yes the instructions in the book state 10 times. Just enough to incorporate all the wet ingredients, but not break down the butter into a paste.
- Empty the pastry onto a clean bench and gather the pastry into a ball.
- I gently kneaded the pastry to help bring it together, but NO more.
- Half the pastry (about 400gm each portion) and press it into a flat disk.
- Warp the pastry with Gladwrap and leave it in the fridge for 2 hours to chill.
- Heat the oven to 175deg Celsius.
- When ready to use, roll the pastry out to around 4mm thick, cut your circles with a cookie cutter and place into a mini tart tin.
- Return the tin to the fridge while you make decorations for “lids”.
- Use the scraps and re-roll and press out stars or another type of decoration for the top of the tarts.
- Fill the mini tarts with your choice of fruit mince meat.
- Add the pastry decoration as the “lid”.
- Bake for between 11-13 minutes until the pastry has browned lightly around the edges.
- Turn out of the tins after 5 minutes.
- I rested a cooling rack on top of the mini tart tin and then turned the rack/tin up the other way and lifted the tin off the cooling rack. With a gentle jiggle the remaining tarts fell out, so don’t hold the tin too high or they’ll crash down onto the cooling rack.
- A half portion of the recipe yeilded me 24 mini Christmas Mince Tarts. The remainder wrapped pastry can be frozen, you might even make your cases and freeze the whole lot ready to go. L&F say you can take from freezer to oven, no need to thaw first, baking time might need to be adjusted.

 And that’s the weekend done and dusted. I’m off on my first (of 9) trip to Hamilton tomorrow night and don’t land back in Christchurch until 10pm Wednesday night. So there will be very little happening in the kitchen this week. I bet Mr Fussy and my MIL will only be using 1 of the dish drawers in my absence. But at least I wont be having to empty 2 dish drawers, I wont have ANY to empty 😀

12 December, 2013 at 11:41 pm
Hi Anita, I loved reading your blog about the snowglobe cookies, you made me chuckle a lot! Especially the bit about the RI gingerbread men not coming easily off the paper as last night I tried to do these and left them to dry overnight and this morning they either stuck or broke…aarrgghh! So I don’t want to give up and will try again tonight……SweetAmbs does make it look very easy to peel them off in her video tutorial so I think you’re right about her wax paper being different to what we get in other countries…I used UK greaseproof paper and it clearly isn’t good enough. I will try again tonight but this time I’m going to grease the paper with some trex first. Anyway, my question to you is, how did you eventually get success with the RI gingerbread men, did you manage to get hold of the US wax paper or did you use something else? Thank you so much and please continue to blog in your comical writing style, I love it! x
13 December, 2013 at 1:19 pm
Hi Tracy. Here’s what I did. Initially I piped the gingerbread men on one large piece of waxed paper. I cut the paper up so I had each gingerbread man on a smaller piece (of the original larger piece). From here I gently peeled a little bit off one arm, then moved to a leg and did the same thing and kept going round and round peeling a little bit more of the paper back each time until there was just the bit in the very middle that remained adhered to the paper. Then take a big breath and hope for the best. The other thing to be weary of, when you pipe a little bit of RI to fix him to the cookie, make sure he’s pushed down (gently) to the cookie so he’s sitting flush. One of my carefully peeled back gingerbread men broke when I was dipping the cookie into the white non pareils. The slight pressure of his legs being smooshed with the white bits, and him not sitting flush with the cookie broke him. As for the waxed paper, I haven’t looked. I can’t even get Press ‘n Seal here (which I’m dying to get hold of). I’m just going to have to be patient and wait for our trip to Canada, UK, Europe and back via San Fran. Oh, and my RI sort of leached onto/into the waxed paper. Once I’d removed the gingerbread man there were the remains of the icing on the paper. Our paper must be a bit absorbent also making it a bit tricky to carefully remove something delicate from it. With greasing the paper with Trex (I assume the equivalent of Crisco), I’d make sure you wiped the excess away with a paper towel. I’m not sure how RI will react with a more slippery surface. Hopefully it still holds shape and doesn’t wander off in a different direction. Piping on a flat surface will help. Good luck and thanks for reading, and taking time to comment 🙂
14 December, 2013 at 5:09 am
Hi Anita, I did a second batch of gingerbread men last night but this time I lightly greased the greaseproof paper with Trex (Crisco) and this morning I had success!! They all came off in one piece extremely easy and the grease didn’t seem to affect the RI, so I’m very pleased! Thank you for the tip of attaching them to the cookie, I’ll be careful. x
14 December, 2013 at 10:49 pm
That’s excellent news! I might have to try that myself next time 🙂 I’m sure your snow globes look terrific with the gingerbread men nicely attached. How big did you make yours and who has to eat them? Cheers, Anita