Eleven years. Not a huge number, not a major milestone either, but the first wedding anniversary that I’ve made a cake for us.
I know that Red Velvet Cake is usually reserved for Valentine’s Day. A day of love. Our wedding anniversary is a celebration of our love so it definitely qualifies for some Red Velvet Cake action.
The recipe is one I read about on Rosie’s blog, Sweetapolita. Rosie makes amazing cakes, decorates them in ways I can only dream of doing and comes up with some very original designs. All of them fabulous. I let Mr Fussy know tonight that the cake has Mayonnaise as one of the ingredients. He laughed. At this time we’d not eaten a slice, but he’d had a little of the trimmings to level the layers. I don’t think he minds, or is repulsed, just finds it an odd thing to have in a cake.
I’ve got 17 more photos to cram into this post. Ready?
Last night I arrived home from having worked the day in Nelson. I knew the cakes would need to be baked in 3 batches, all because there’s baking soda which is activated with vinegar. That means the rising of the cake has already begun as soon as those two ingredients pair up. The cake takes around 18-26* minutes to bake. Far too long to leave the last layer waiting for baking time. If only I had three 6” cake tins. I’m going to buy more but too late for this escapade.
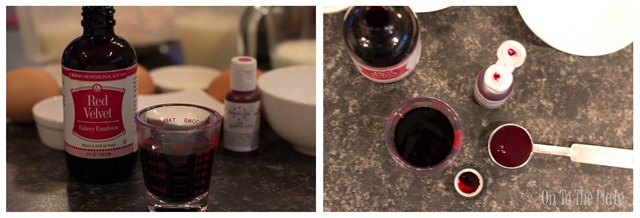
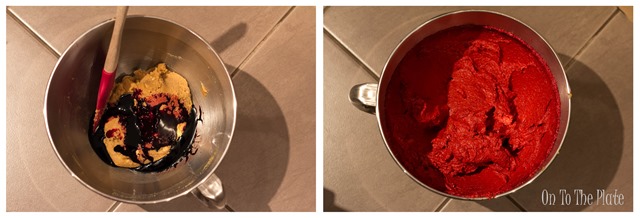
Up until this cake, I’d only eaten one serving of Red Velvet Cake. Mum and my eldest sister met up for a late night catch up where I ordered a slice at Coffee Culture. I’ve got to say I was less than impressed. This cake has rave reviews. Perhaps hearing so many people gushing about the cake ruined the experience. It just didn’t seem to stack up to all that praise. Rosie used a Red Velvet Emulsion from Lorann. I’d searched Amazon for it to see what it was. It wasn’t worth me buying it from overseas, at least not on Amazon. Then I saw it on an Etsy store. I still hesitated. Then I found it by accident when I was looking at Cake Stuff’s website and I immediately put in an order (along with a bunch of other stuff). The emulsion adds most of the colour. Adding a teaspoon of Super Red Americolor is a bonus, but not essential. Thankfully there’s no horrible food gel taste. I’m not sure I could tell you what the emulsion adds since I’ve not made the same recipe without it. But it tastes much MUCH better than I had hoped for.
I’m not at all enjoying the lack of natural light in the kitchen early in the morning. Autumn is creeping up on me and I’m just not ready to embrace it. But the photos are getting harder to take, and the lights are now on in the kitchen in the morning. But for all that, I’m pretty sure the colour red is unmistakable.
It took ages to finish baking all the cakes. Pretty much I was making 3 individual cake batters. My idea of making hot cross buns in time for lunch evaporated after I finally got the first cake baked.
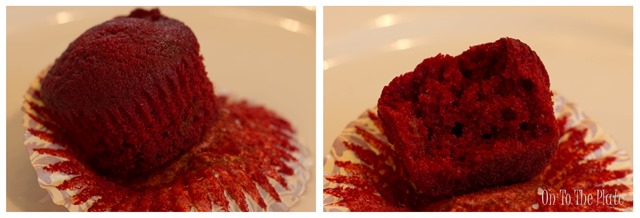
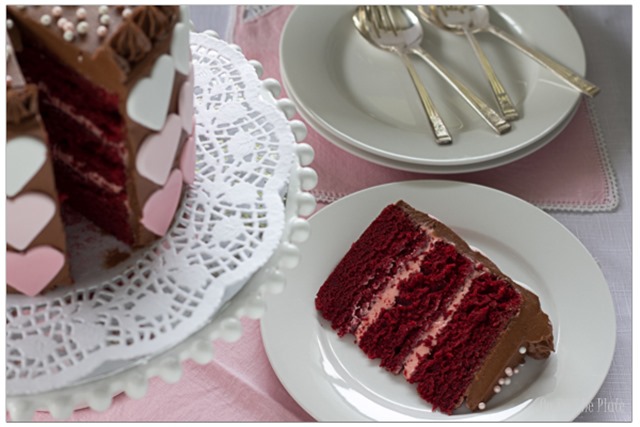
Of course if I’d not overlooked missing the vinegar/baking soda ingredients in the last cake I’d have saved a little time. Thankfully the cake hadn’t gone into the oven yet. But it was in the cupcake liners and the cake tin. I had to scrape it all out and back into the bowl so I could mix in those two very important ingredients. Above is a pretty good set of photos to show the colour and texture of the cake. And it was my first sampling of the cake. And I was impressed with how moist the cake was, the springy, but light texture, and that taste.
As the next cake had finished baking and was sitting in the tin for 5 or so minutes the previous cake was wrapped in Gladwrap and placed in the fridge. When all 3 cakes had been in the fridge for at least 30 minutes I then took them out and trimmed the tops to flatten the layers. I’m getting better at this. Though I’d rather the cakes didn’t dome and I didn’t have to trim them at all. I spread the batter around in the tin so the middle has less, quite a lot less, but they still bake up domed. I’ve ordered some Wilton baking strips. I hope they work, though they’re for an 8” or 9” tin.
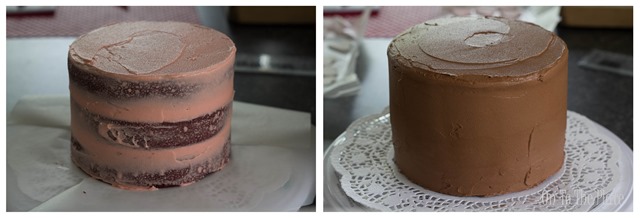
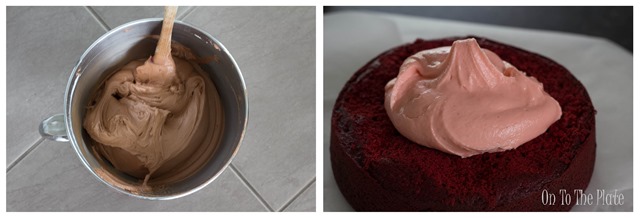
First thing in the morning I actually made a white chocolate ganache which I’d had in the fridge for several hours. But I stuffed it up and turned away (less than two minutes after starting mixing on low, and for less than a minute away from the bowl) from the mixer as it was whipping, and ended up with a curdled mess. I tried to revive it. I spent hours (probably) trying to get it to come to room temperature and then try a few tricks that I’d read about online. Even adding gelatine. But I had to admit defeat. In the end I used the same recipe for the chocolate frosting replacing the dark chocolate for white chocolate, and only made 1/2 the batch. I love the pink against the deep red of the cake.
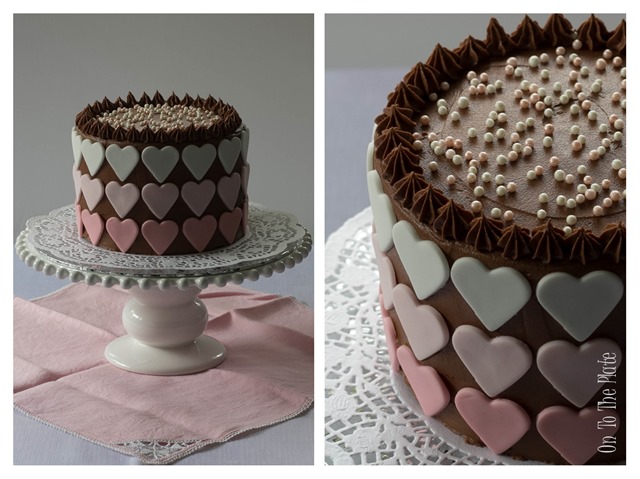
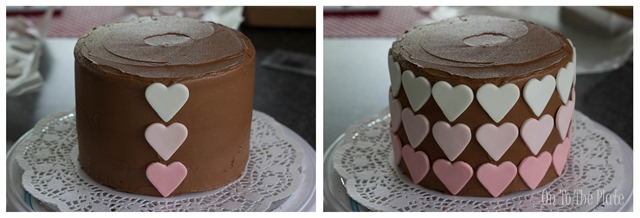
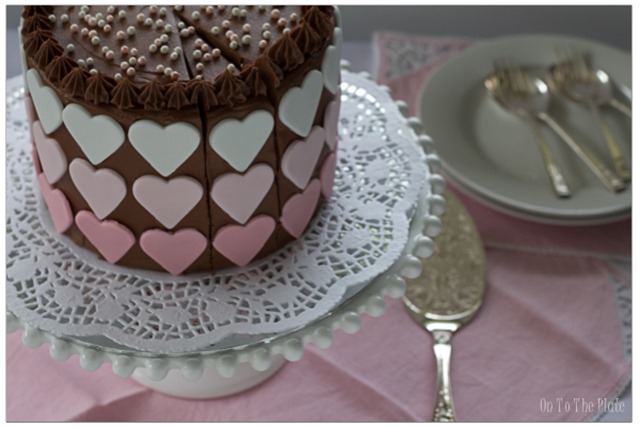
I’d made the fondant hearts during the week. That was quite fun, and really didn’t take very long. I love my fondant roller with the guides to make sure the fondant is the same thickness all the way. I’d measured the cookie cutter I used, and I even laid the hearts around the cake tin to see how high I would need the cake layers to get all 3 colours around the cake. I think I managed to work it out just right. Though I really didn’t know until the first layer baked and I could measure the height. You see the recipe is for a 3 layer 8” cake. I had to guess how much batter I’d need in the tin. And I was a little off on the first one. But it all worked out.
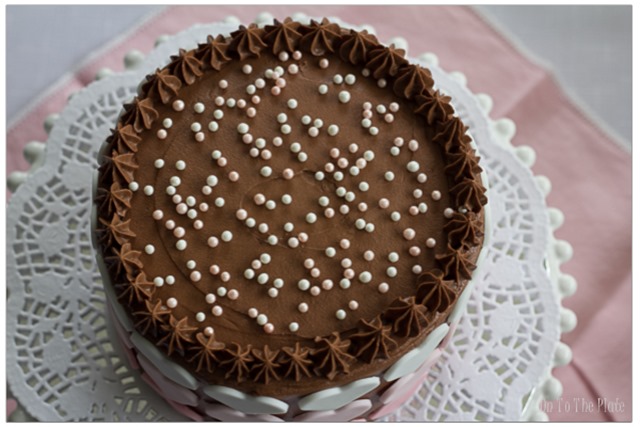
I had some white and pink pearls sitting up in the spare room (where my increasing stock of cake decorating things are hiding out). Mr Fussy took the two containers and was shaking them about like maracas. It’s good to see he’s not growing up too fast. Actually I’ve been very impressed with his willingness to contribute to solutions as I bake and decorate things I’ve never tried before.
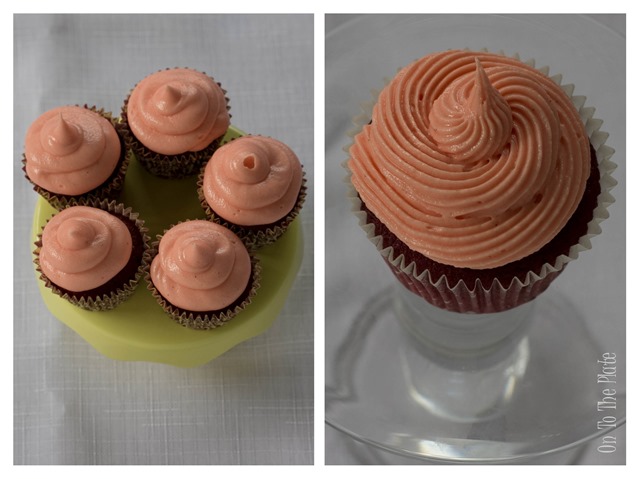
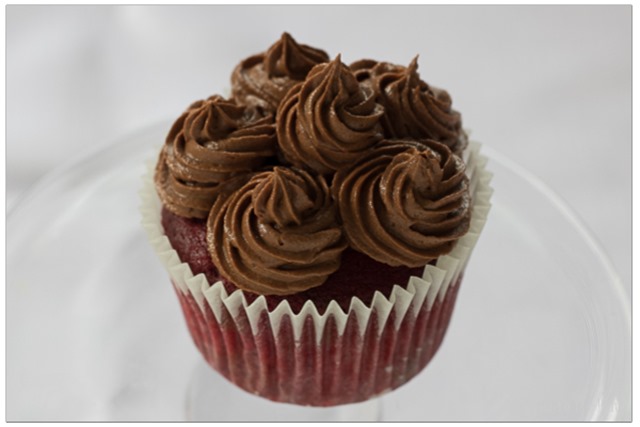
I had enough batter to make cupcakes. There’s more than enough for Mr Fussy for the week. I especially love the white chocolate frosting, which is difficult to taste when eating a slice of cake. But I reckon those pretty pink red velvet cupcakes will be perfect if you’re a white chocolate lover. Which I am. I thought I decorated the dark chocolate cupcakes a little more “manly”. I tried to do lots of things with the same tip. Maybe it’s only the colour of the frosting that makes these a little more masculine.
As I was bringing the cupcakes over to the table to photograph, one of the French Tip decorated ones (the right hand photo) slid off the cooling rack and toppled over, icing side down. Of course. Thankfully it didn’t dirty the tablecloth if you can believe it, but the frosting was all smooshed on one side. I scraped the rest off and frosted it with the chocolate. I’d run out of white chocolate and I couldn’t be bothered setting up another icing bag just for one cupcake. Never fear, the frosting wasn’t wasted. It’s fair to say I was pretty full before we went out for dinner tonight. And I certainly had no room for dessert. But by the time we got home and sat for an hour I was happy to share a slice of the Red Velvet Cake with Mr Fussy.
Look at that red. I don’t feel the slightest bit guilty about how much food colour must be in there because all but 1 teaspoon of it came from the Emulsion. It’s a little of what you don’t know doesn’t hurt you.
I reckon it’s time to share Rosie’s recipe.
Red Velvet Cake by Rosie of Sweetapolita
Ingredients
For the Cake – 3 layer 8”
- 3/4 cup (170 g) unsalted butter, at room temperature
- 1 cup (225 g) packed light brown sugar
- 1 cup (200 g) white sugar
- 3 tablespoons (45 ml) *red velvet flavour
- 1 teaspoon super red soft gel paste, optional
- 3 eggs, at room temperature
- 2 cups (260 g) all-purpose flour
- 1/2 cup (55 g) cake flour (1.5 tbs of cornflour topped with standard flour to measure 1/2 cup)
- 1 tablespoon (8 g) Dutch-process cocoa powder
- 1 teaspoon (8 g) kosher salt
- 1-1/2 cups (360 ml) buttermilk, warm
- 1/4 cup (60 ml) mayonnaise
- 1 tablespoon (15 ml) vinegar
- 1-1/4 teaspoons (8 g) baking soda
For the white chocolate frosting
- 225gm butter, at room temperature
- 2 cups icing sugar, sifted
- 1/2 tablespoon vanilla bean paste
- 125gm quality white chocolate, chopped, melted and slightly cooled
- 1/4 cup cream (35-37% fat)
- A drop of red or pink gel food colouring if you wish
For the dark chocolate frosting
- 454gm butter, at room temperature
- 4 cups icing sugar, sifted
- 1 tablespoon vanilla extract
- 250gm quality dark or extra dark chocolate, chopped, melted and slightly cooled
Instructions
For the cakes
- Heat the oven to 160 degrees Celsius
- Weigh your mixing bowl.
- Prepare the cake tins: spray with baking spray on the bottom and sides. Place a round piece of baking paper to the bottom and lightly spray the bottom.
- In a bowl sift the flours together. Add the salt and mix then sift the cocoa. Mix all the dry ingredients together.
- Mix together the butter and sugars, Red Velvet Emulsion and red gel (if using) in a stand or hand mixer on medium until it has increased in volume and the red is slightly duller (indicating it’s creamed properly).
- Add the eggs one at a time, mixing gently until fully incorporated.
- Add half the dry ingredients and mix on low until incorporated.
- Add all the buttermilk and mix on low until incorporated.
- Add remaining flour mixture and mix on low until just incorporated.
- By hand gently mix in the mayonnaise.
- Add the vinegar to the baking soda and stir together – it will fizz up.
- Whisk the vinegar/baking soda mix into the cake batter.
- Weigh the mixing bowl subtract the weight of the empty mixing bowl, and divide this figure by 3. This is the amount of batter you want for each of the 3 cake tins.
- Spread the batter into the cake tins, you may want to make a small hollow in the centre in your cakes usually dome.
- Place the tin into the oven and bake between 18-26 minutes, using a toothpick to check. The toothpick should come out clean. The cake will have pulled away from the sides and the cake with be springy and bounce bake when lightly touched.
- Leave the cakes in the tin for 5-10 minutes before inverting onto a cooling rack.
- Once the cakes have cooled, but not cold, wrap them in Gladwrap and place flat in the fridge for at least 30 minutes.
- When the cakes have been in the fridge for at least 30 minutes remove the wrapping and trim the tops to flatten the layers – if necessary.
For the white chocolate frosting
- Place the chocolate into a heavy bottom pot on low heat. Stir the chocolate gently preventing it from catching on the bottom of the pot and burning.
- When the chocolate has melted take the pot off the heat and allow the chocolate to cool slightly.
- Place the butter and sifted icing sugar into a stand mixer and slowly mix until fully combined. Scrape down the bowl.
- Add the vanilla bean paste and mix on medium speed. Scrape down the bowl as necessary.
- Add the cooled white chocolate and beat in medium speed for several minutes.
- Add a drop of food colouring if you wish.
- Slowly add half of the cream while mixing on low speed. Continue to add the cream until you reach the desired consistency.
For the dark chocolate frosting
- Place the chocolate into a heavy bottom pot on low heat. Stir the chocolate gently preventing it from catching on the bottom of the pot and burning.
- When the chocolate has melted take the pot off the heat and allow the chocolate to cool slightly.
- Place the butter and sifted icing sugar into a stand mixer and slowly mix until fully combined. Scrape down the bowl.
- Add the vanilla essence and mix on medium speed. Scrape down the bowl as necessary.
- Add the cooled chocolate and beat in medium speed for several minutes until it is light and fluffy.
To assemble the cakes
- Place the first layer onto a serving plate cut side facing up.
- Spread with white chocolate frosting.
- Gently place the second layer on the white chocolate frosting, cut side down.
- Lightly press the second layer to release any air bubbles in the white chocolate frosting.
- Repeat adding another layer of frosting and the final cake layer.
- Frost the top of the cake and crumb coat the cake.
- Leave the cake in the fridge for 30 minutes.
- Frost the top of the cake with chocolate frosting and gently smooth more frosting around the outside of the cake as thick as you desire.
- Smooth the frosting if you wish, or use a pallet knife to add some texture.
- Decorate the cake as you like.
I’m not done with the photos yet!
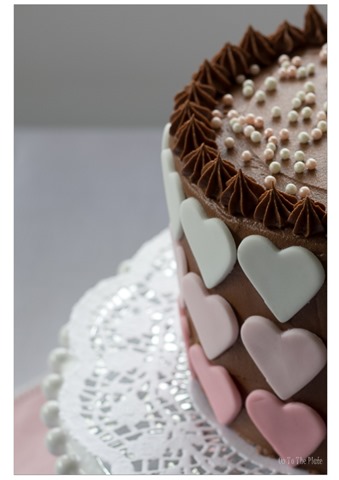
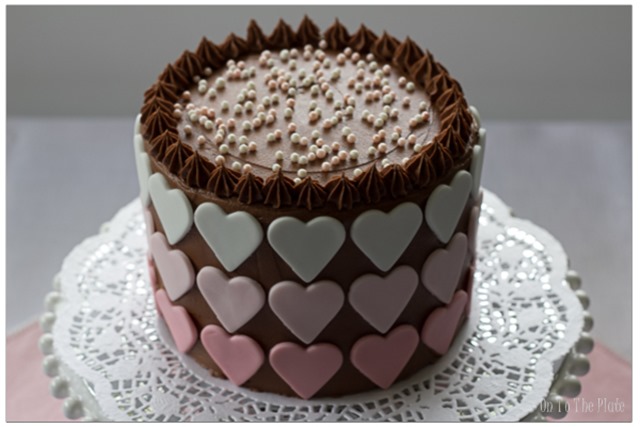
I actually found the decorating of the cake to be fairly simple. I’ve gotten the knack of how to prepare the decorating board and doiley to protect it from the frosting. It still takes a little time to put the final layer of frosting on, especially when I’m trying to get that perfectly smooth finish. Which I laughed at. I was placing fondant hearts all around the side and I was fussing with getting it as smooth as possible. I actually found the pastry scraper I have to work really well. It was the first time I used it and I’ll use it again. I might even buy one of those texture scrapers so that I can have a bit of fun and not have to look so critically at the smoothness.
I have 14 fondant hearts (of each the 3 colours) around the cake. That means the slice is actually quite small. I hoped I could ease a slice out without messing the whole lot up. It wasn’t too bad, but the cake slice was too wide, of course. It meant I had to slide it out rather than up and out. It worked fine, with a little bit of jiggling, but there was no way that thin slice was going to stand up on the plate.
Despite one of my layers not being quite as deep as the other two, I can’t tell which it is. I think the cake looks really great. If I didn’t there wouldn’t be so many photos ![]()
We shared a slice of cake with as much fun as we share our lives together. I wouldn’t have it any other way.
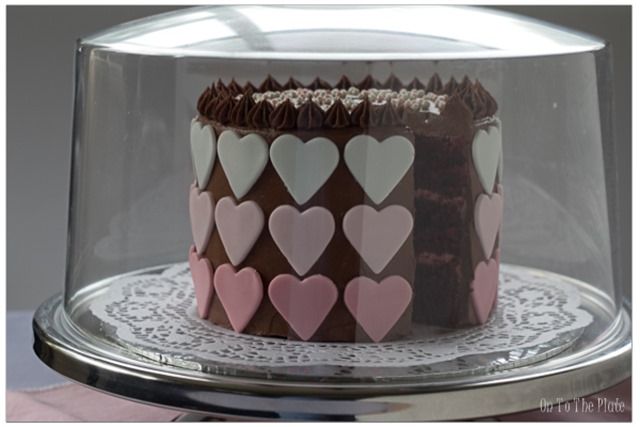
Well that took care of two slices with my MIL having one for dessert. Just 12 more slices to go. Just as well I have a couple of food covers, the type you’d typically see in a cafe. Unfortunately I don’t have a shelve in the fridge deep enough. I will put the cake back in the fridge tomorrow during the day and bring it out again about 30 minutes before serving.
Happy Anniversary Mr Fussy!



17 March, 2013 at 8:21 am
It looks absolutely devine Anita – Happy Anniversary to you both! I think you are very talented and a business opportunity!
17 March, 2013 at 2:35 pm
Thanks Louise 🙂
23 March, 2013 at 12:02 pm
Just got around to reading your blog on this divine looking Anniversary cake. WOW is all I can say. You are incredibly patient, the results prove it! I’m a ‘whip it up and eat’ baker, you bake/create with finesse:)
23 March, 2013 at 7:34 pm
A shame Jasmine didn’t pop in and pick up the cake. It is possibly the best tasting cake I’ve had. So different. We finished off the last 3 cupcakes at lunch today. The cupcake tasted just as fresh as it did a week ago. Such a good recipe.
23 March, 2013 at 3:18 pm
Thanks for the tip about the red velvet emulsion….I have some coming my way now! I was disappointed when I made some red ,velvet cupcakes a while ago as the colour was so pale….now I can rectify that and enjoy the deep red they are meant to be 🙂 yummmmmmm!
23 March, 2013 at 7:32 pm
Hi Bec, glad to have shared something that’s of help. The cake tastes so nice, it really does. I’m not sure how much the extra teaspoon of Super Red food gel makes. I’m so impressed with the colour. Hope you’re happy with how your RV Cake turns out 🙂
28 November, 2013 at 11:45 pm
Amazing!!! I love this, just wish I had the skill and patience!
29 November, 2013 at 5:45 am
Thanks. I was lucky it all pieced together evenly around the cake. The design is pretty simple but I think gives a lovely look.